Recipe Admirers !!!!!!

Saturday 14 September 2013

Coconut Modak

"Happy Ganeshutsav"

Ganpati Bappa has arrived with a bag full of  good wishes, happines
and prosperity. We all love this festive season and like each year its time to indulge in some sweet treats :)
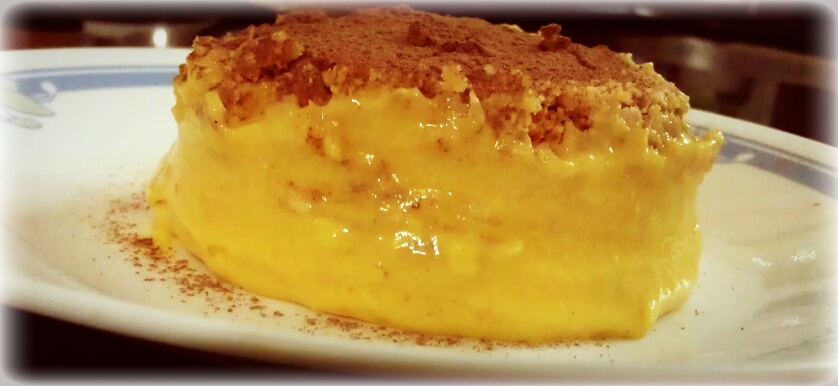
I had shared Saffron Modaks recipe last year and this time i tried a new recipe. Today I am sharing a lovely & yummy recipe of Coconut Modaks.
I made these modaks to take as bhog for Dagdusheth Ganpati in Pune.
They say that when you make something to offer to god, you dont have to worry about the taste as it will turn out divine. To my surprise and happiness, the modaks came out exactly  like I wanted and were a hit with everyone there. I can assure you that you will get immense  praise and appreciation for these sinful modaks.
Enjoy the recipe and enjoy the festival.


" Coconut Modaks"

Ingredients : 

300 gms dessicated coconut ( dry) + 1 cup extra for garnishing
1 tin milkmaid or condensed milk
100 gms milk powder
1 tbsp cardamom powder
a pinch of saffron colour
Kewda essence
few saffron strands 

Preparation:
  • Take coconut,milk powder and milkmaid in a deep non stick pan. Mix well and then put it on the gas to cook on low flame. Keep stirring and mixing all three ingredients
  • Add saffron strands, colour,cardamom powder and kewda essence. Mix well
  • Once the mixture leaves the sides switch off the gas. If you overcook, the coconut will start changing colour so avoid that
  • Let it cool down for few minutes.
  • Make small balls and shape them like modaks. Roll each modak in dessicated coconut powder and arrange on a plate.
  • Serve fresh. You can store these modaks for upto a week.
Note : Kewda essence and food colour is optional. Do not add sugar as the recipe is quiet sweet with the use of milkmaid.


Monday 2 September 2013

Small Rasgulla Pudding

September has arrived and with it comes the superb time of festivals. Ganpati is all set to step in next monday and I can see decoration and pandal work going on everywhere. During this time my cakes take a small backseat as desi indian sweets come to the fore. A little indulgence for everyone and a time to celebrate and enjoy with our loved ones. 
Today I'll share a milk based recipe which is superbly delicious and easy to make. 
Small Rasgulla Pudding. I have made the small rasgullas ( sweet milk dumplings) from scratch, but if you are short on time then you can get readymade rasgullas and make this dessert. If you buy from outside then boil them in water for few minutes to remove the sugar syrup and sieve and keep aside. 
Hope you enjoy the recipe :)


"Small Rasgulla Pudding"

Ingredients : 

For small Rasgullas ( Milk Dumplings)

4 cups milk
2 tbsp lemon juice
4 cups water

For the pudding 

2 cups milk
1/2 cup khoya ( dried whole milk)
1 cup sugar - powdered
few saffron strands
1 tbsp cardamom powder
few drops rose essence
Dry fruits for garnishing


Preparation:
  • For making the small rasgullas, boil milk in a heavy bottom pan. As soon as it comes to a boil, add lemon juice and on slow heat keep stirring. It will curdle completely. ( Cottage cheese will be seperate from the liquid)
  • Drain the cheese and wash it in running water. Dry the cheese in a muslin cloth or sieve for an hour.
  • Knead the cottage cheese thoroughly to form a smooth and pliable dough. Make very tiny small balls and keep aside. 
  • In a pressure cooker, add water and bring it to a boil. Add the cheese balls and close the lid.
  • Steam them for one whistle and let it cook on slow heat for 7-8 mins. ( you can boil them in a heavy bottom pan in boiling water for 15-20 mins)
  • Remove and drain from the water and keep aside. 
  • To make the pudding, heat milk in a heavy pan. Once it reduces to half, add khoya and sugar. Stir well and cook in slow flame to form a thick sauce. Add saffron strands soaked in warm milk, cardamom powder,rose essence. Mix well. Prepare a thick creamy pudding sauce. 
  • Turn off the heat and add the rasgullas in the creamy liquid. Stir and garnish with dry fruits. 
  • Let them soak for few hours. Chill in refrigerator before serving. 
Note : you can add or reduce sugar as per your tastebuds. If you are using readymade rasgullas then dont add sugar in the pudding. 


Thursday 15 August 2013

"Raisin Golden Cookies"

Happy Independence Day people. 

I like to play with different dryfruits while baking as they provide a lot of texture and taste to the whole recipe. Raisins, almonds, cashews,walnuts,pinenuts,dates,figs,pecans,etcetc. You can use any of these magical ingredients or a mix of them and convert your plain and dull cookies and cakes into something marvellous that will be devoured by elders and kids at all times. 
Today I am sharing a simple homestyle and damn easy recipe of Raisin cookies. All you need is simple cookie ingredients and some golden raisins to bake these fancies. 
Enjoy the sweet raisins recipe and have a wonderful day.


" Raisin Golden Cookies"

Ingredients:

1 cup self raising flour
1 tsp baking powder
a pinch of salt
1/2 cup brown sugar or normal caster sugar
5-6 tbsp soft butter
1 small egg
few tbsp of milk ( around 1/8th cup)
5-6 drops of vanilla essence
1/2 cup golden raisins
1 tsp cardamom powder


Preparation:
  • Preheat the oven at 190*C for ten minutes before baking. Line baking sheets with baking or parchment paper ( Do not bake without the baking paper as the cookies will stick to the tray and break while lifting)
  • Take a bowl and add flour,baking powder,salt and cardamom powder. Mix well.
  • Add sugar,butter,egg and milk. Whisk well to form a smooth dropping batter. Add vanilla essence and mix.Once its throughly mixed add raisins and mix.
  • Now take a deep spoon and drop small cookie sized drops on the baking sheets. ( Do not drop bigger portions as the cookies will expand while baking. Also keep a good space between cookies to give them area to expand). 
  • Bake these cookies in the preheated oven for around 10 mins till golden brown from sides and light brown on top.
  • Remove from oven and let them cool before removing from the paper. ( Do not remove when hot as they will crack)
  • Once cool remove and store in an air tight container. As it contains egg consume them within two to three days or else store in refrigerator after two days. 
Note : Do not overcook the cookies else they will get hard and burnt. Also you will need to keep a watch while baking as once the oven is hot, the second batch might bake in around 8 minutes.


Sunday 28 July 2013

" Fudgy Mushy Brownies "

In the beginning, the Lord created chocolate, and he saw that it was good. Then he seperated the light from the dark, and it was better. 

Oh, divine brownies. Any season, any occassion or any day, one form of cake that will never get old is Brownies. A single square chunk of this delicious cake is enough to uplift your tastebuds. 
Plain brownies, brownies with icecream or sizzling brownie, you will relish it in any form and crave for more. 
I have shared walnut brownie recipe before and today I will share another dense chocolate brownie recipe. 
This Brownie recipe creates fudgy, dense and extremely rich brownies. 
Enjoy the recipe :)


" Fudgy Mushy Brownies"

Ingredients : 

1/2 cup soft butter
3/4 cup sugar 
2 eggs
1 tbsp vanilla essence
1/3 cup cocoa powder
1/2 cup self raising flour
a pinch of salt
1/4 tsp baking powder


Preparation:
  • Preheat the oven at 180*C for ten minutes before baking. Line a square brownie or cake baking dish with butter or parchment paper
  • Beat the butter and sugar together till light and fluffy. Add eggs and whisk well. Add vanilla essence.
  • Add cocoa powder,flour,salt and baking powder. Mix well and form a smooth batter
  • Drop the batter in the lined tin and make it even
  • Bake in the preheated oven for 25 minutes. Check with a toothpick or knife. Do not overbake.
  • Let it cool. Slice in square pieces and store in an airtight container. 

You can enjoy the brownies they way they are or make them more tempting by adding some fudge icing.
To make the icing - mix little butter, cocoa powder and icing sugar together and make it smooth. Pour this icing on the brownies when its still warm and fresh. Once cool, slice and serve. 


Wednesday 10 July 2013

"Dense Chocolate Muffins - Pure Indulgence "

Forget Love -- I'll rather fall for Chocolate !!!!

I am back with a little more of choco indulgence. Earlier in my blog I have already shared two chocolate muffin recipe ( with and without eggs), but as my love for chocolate is neverending,so here I am with another beautiful recipe.
I created these muffins as an experiment with dark and white chocolates. I had these two bars lying in my fridge craving to get converted in some wonderful dessert. I used them both with some staple muffin ingredients and Voila ! what came out was the most indulgent and magical muffins that I had ever eaten.
This recipe creates completely dense, rich and chocolate indulgent muffins. Pair them up with a cup of coffee and you will not want to talk to see anything else.
You can store them in air tight container for upto a week after refrigeration.
Enjoy this recipe and a little kick of that chocolate ;)


"Dense Chocolate Muffins - Pure Indulgence "

Ingredients :

100 gms dark chocolate
100 gms sugar
50 gms butter
250 ml milk
1 tsp vanilla essence
2 eggs
300 gms flour
1 tbsp baking powder
a pinch of salt
150 gms white chocolate


Preparation:
  • Soften the dark chocolate by keeping it at room temperature for few hours. Once soft, break and whip it in a bowl to form a creamy texture ( If not then warm it in microwave for 10 secs and then whip)
  • Sieve flour, baking powder and salt in a big bowl. 
  • In another bowl whisk butter, sugar and eggs till light and fluffy. Add this to the flour mixture. Mix well
  • Add milk, vanilla essence and mix it properly to form a smooth pouring batter.
  • Now add the dark chocolate liquid and whisk for few minutes. 
  • Chop the white chocolate in small fine pieces and add it to the batter. Give it a slight stir to avoid breaking the white chocolate. 
  • Line the muffin cups or tray with baking or parchment paper. Fill the cups with the muffin batter till 3/4th quantity. 
  • Bake in pre heated oven at 180*C for 30-35 mins till all the muffins are well risen and baked. The top part will be a little broken once they are fully done. 
  • Let them cool on a wire rack. Unmould and serve. 
Note : You can use nuts like almonds and walnuts in these muffins. You can also drizzle some white chocolate shards on top before baking. You can use either chocolate compound or any other type of chocolate for this recipe. 


Wednesday 12 June 2013

" Whole Wheat Apple Crumble Cake" - Eggless

Monsoon and a big appetite comes as a bundled package for three months. As the temperature starts dropping, our urge to eat fried and hot things starts increasing. I love to bake in this season and pair it up with hot cups of tea and coffee. Nothing is more beautiful than sitting by your windowsil, watching the raindrops and greenery and enjoying some yummy bakes and cakes in this weather.
So, let me share another wonderful recipe of Apple cake. This recipe is eggless and consists of whole wheat and brown sugar. You can enjoy each bite without worrying about those excess calories :)
Enjoy the recipe and the beautiful weather. 


" Whole Wheat Apple Crumble Cake"

Ingredients : 

1+1/2 cup whole wheat flour
2 small red apples - finely chopped
1 cup brown sugar ( you can reduce the quantity a little as the apples will be sweet)
1/3 cup of olive oil
1 small cup of warm water
1 tsp baking soda
1 tsp baking powder
1/2 tsp salt
5-6 drops of vanilla essence
1 tbsps of ground spices ( cinnamon,clove,nutmeg) - optional
1 cup walnuts chopped


Preparation:
  • Sift the flour, baking powder and baking soda in a mixing bowl
  • Mix the oil,sugar and vanilla essence.
  • Add the oil mixture to the flour mix and mix well.
  • Add salt,spice powder and warm water and beat to form a smooth mix.
  • Add apples and walnuts and mix well.
  • Grease a cake tin and line with paper. Pour the cake batter and set well.
  • Bake in a preheated oven at 180*C for 25-30 mins till brown and done. Check with a skewer or toothpick.
  • Let it cool on a wire rack, remove and serve.

Note - This cake will have a nice crumbly crust on top. Serve it warm with custard sauce in cool weather and with icecream in warm weather. You can store this cake in an airtight container for two to three days.

Sunday 2 June 2013

"Mango Delight"


Mangoes are ruling the market right now. I had to make atleast one dessert before the season ends and what could be more better than a chilled Mango pudding cake. If you have tried my previous recipe on Mango cheesecake then you will definitely love this one.
This recipe is super fast, delicious and light to taste. Do try this recipe and enjoy the beautiful weather :)


" Mango Delight"

Ingredients :

2 big ripe mangoes
1/2 cup thick cream
1/2 cup cottage or cream cheese
4-5 tbsp sugar
1 tsp cardamom powder
1 small loaf ( 50gms) cake loaf ( any flavour will do. You can use readymade cake slices)
8-10 digestive biscuits
4 tsp butter - soft 
Mixed nuts - almonds and cashews chopped
chocolate powder for dusting


Preparation:
  • Grease pudding moulds with butter and keep aside. 
  • Crush the digestive biscuits and mix with butter. 
  • Press the mixture in the moulds to form a smooth layer at the bottom. Keep in the fridge to chill
  • Use a blender and add mangoes, cream,sugar,cheese and cardamom powder. Blend to form a puree.
  • Remove the moulds from the fridge. Make thick slices of the cake and place in the center. Add few chopped nuts over it.
  • Pour the mango puree on top of the biscuit and cake layer. Repeat the process with the other moulds till all the puree is used. 
  • Refrigerate for atleast 4-5 hours till set and firm. 
  • To serve, remove from the fridge. Run a sharp knife around the pudding before inverting it on a plate. Be careful at this stage to avoid breaking the dessert. ( I prefer using silicone moulds for these types of dessert as its easy to invert the dessert). The biscuit layer will be on top after its removed
  • Dust with chocolate powder and serve chilled. 
Note : You can use vanilla or chocolate cake as that adds to the texture and flavour of this dessert.


Tuesday 21 May 2013

"Coconut Cake"

I had to go to a friends place for dinner so I baked this yummy cake to gift them. This cake is a lovely sponge cake with the goodness of coconut and caramelisation of brown sugar. You have the option of using fresh grated coconut but it tastes best with dried shredded coconut. The use of brown sugar on top adds crunch and texture to the cake and adds in more flavour. 
Hope you like this recipe and enjoy the coconutty sponge.


" Coconut Cake"

Ingredients :

175 gms self raising flour
1 tsp baking powder
100 gms soft butter
100 gms caster sugar
2 eggs
2 -3 tbsp milk
few drops vanilla essence
4 tbsp coconut powder ( dried shredded coconut)
3 tbsp brown sugar
2 tbsp dried coconut powder for garnishing
handful of chopped cashews and raisins

Preparation:
  • Preheat the oven at 180*C for ten minutes before baking
  • Sieve flour and baking powder together.
  • Mix butter and sugar together till light and smooth. Add both the eggs and whip the mixture properly.
  • Add vanilla essence and mix well. Pour this mixture in the flour and mix it properly.
  • Add milk and keep mixing to convert it into a smooth batter. Add coconut powder and mix well.
  • Add chopped nuts, mix and the batter is ready.
  • Grease a cake tin and line it with a baking parchment paper. Pour the batter in the prepared tin.
  • Bake the cake in the preheated oven for 25 minutes. Switch off the oven. Garnish the cake with brown sugar and coconut powder mix and bake it again for another 10 minutes. 
  • Cool on a wire rack. Cut and serve. 

Note : You can skip the brown sugar garnishing if you wish to place icing on this cake. This cake tastes best with butter cream icing and brown sugar syrup. You can serve this cake with smooth butterscotch icecream for a complete dessert.


Monday 8 April 2013

"Bolinhas -- Tea Time Cookies"


Biscuits and cookies are an integral part of every kitchen cupboard. I cant imagine having tea without cookies on any day. I usually stock up on different flavoured cream biscuits and sweet & salt ones. So this time I thought of making some different ones at home. Todays recipe is of a Goan teatime cookie called Bolinhas. These cookies are absolutely flourless and light and chewy. They taste best with a cup of tea or a scoop of icecream on a sunny day. You can prepare a lot many and store in an airtight container for upto a week. 


" Bolinhas - Tea Time Cookies "

Ingredients : 

1/2 cup grated coconut 
3/4 cup fine semolina
1 egg
2 tbsp butter
less than 1 cup fine caster sugar
10-15 cashewnuts - chopped
1/2 tbsp cardamom powder
1/2 tsp salt

Preparation:
  • Beat the egg till light and fluffy. Cream the butter.Add the egg,semolina,sugar,chopped cashews,cardamom powder and salt and mix well.
  • Set this mixture aside for atleast eight hours to ferment.
  • After eight hours add the coconut and mix well. 
  • Line a baking tray with butter or parchment paper. 
  • Bake small balls of the mixture and flatten slightly to shape like a cookie. Arrange on the baking tray.
  • Bake in a preheated oven at 180*C for around 15-20 minutes till light golden brown.
Note : For soft and fluffy bolinhas, it is important to ferment the batter for eight hours else they will get hard after baking. You can decorate them with cashewnuts on top before baking.

Friday 29 March 2013

"Parwal Mithai/ Sweet Pointed Gourd"

It was the festival of Holi two days back and I had a lovely time with family and good food. Hope you all too had a wonderful Holi. Apart from the default gujiyas and sweets, I tried a very old sweet recipe ( mostly prepared in Northern parts of India ) which I last had in my school days. I remember my aunts making this sweet on special occassions and it used to taste divine. When I saw parwals (pointed gourd) vegetable in the market, I instantly had the urge to make it for Holi.
So here I am sharing yet another old and sweet recipe of Parwal Mithai/ Sweet Pointed Gourd today.Its easy to make and delicious to taste. You can make it in big quantity and store in airtight container in the fridge for upto a  week. 


"Parwal Mithai/ Sweet Pointed Gourd"

Ingredients :

250 gms Parwal ( Pointed Gourd)
200 gms khoya/mawa ( dried whole milk)
2 cups Thin sugar syrup ( made with 1/2 cup sugar and 2.5 cups water)
3/4 cup sugar
1 tbsp ghee ( clarified butter)
cardamom powder
almonds/pistachios for garnish


Preparation:
  • Peel the parwal vegetable and slit it midway lengthwise and remove the core.
  • Blanch the parwals in hot water for 5-6 minutes and remove in a seive to remove the excess water.
  • Prepare the sugar syrup to a thin ( one wire) consistency and add parwals. Cook them in the syrup on slow flame for around 10-15 minutes till they are cooked and soft. You will see a slight colour change once they start cooking. Switch off the gas and cover the pan and leave for another 10 minutes to soak. Drain the parwals and let them cool
  • To make the stuffing, heat ghee and saute the khoya in a non stick pan on medium heat till it becomes soft and changes slight colour ( you will get the aroma of cooked khoya)
  • Add the sugar and and saute till light golden in colour
  • Add cardamom powder and few chopped nuts and mix well.
  • Let the mixture cool for sometime before stuffing
  • Now to prepare the sweet, take the parwal and stuff it with the mixture properly. Repeat the process with all the parwals. Garnish with chopped nuts and chill for few hours before serving.


Notes : You can use readily made khoya barfis or any other flavoured burfis/milkcakes for the stuffing if you cant make the khoya filling. You can also use saffron for garnish and in the stuffing to add more flavour.